# Integrate AWS IOT
# Create a thing
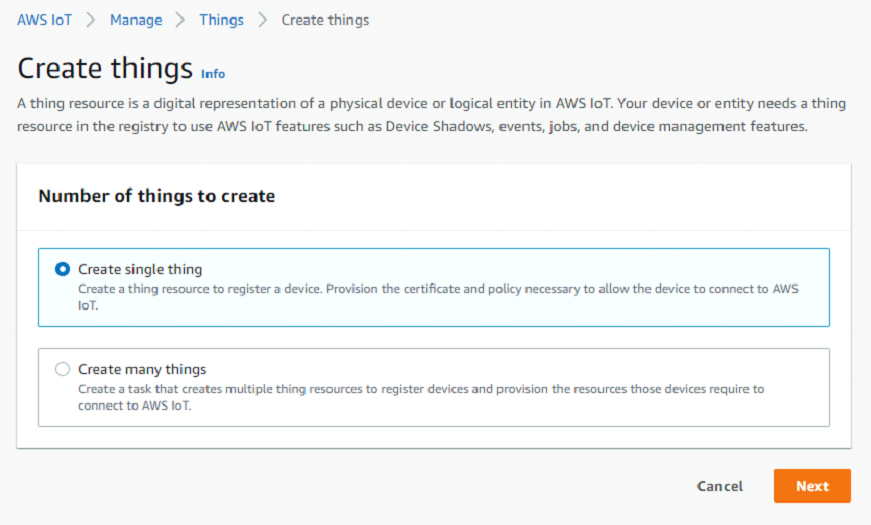
- From AWS console, search for IOT core
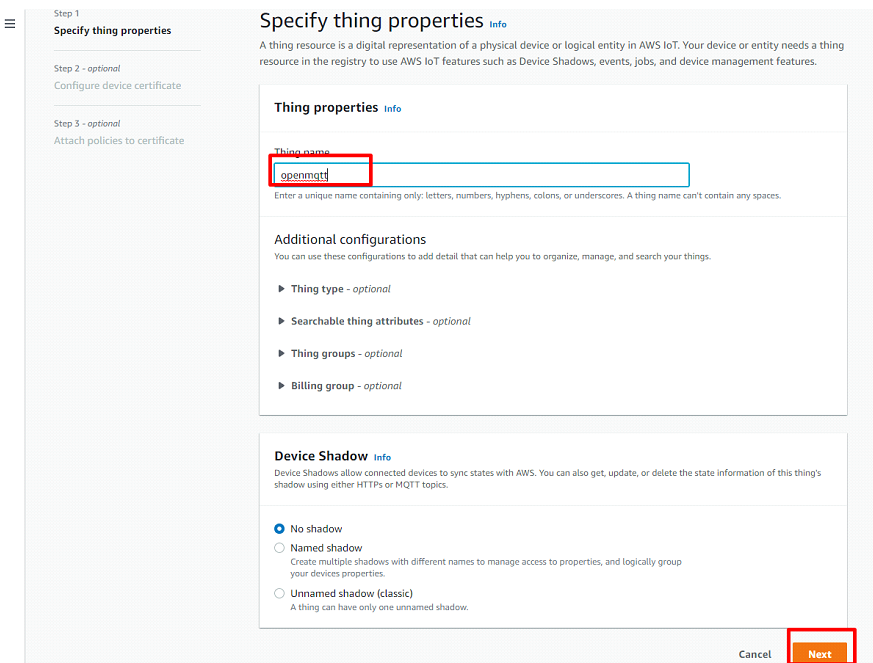
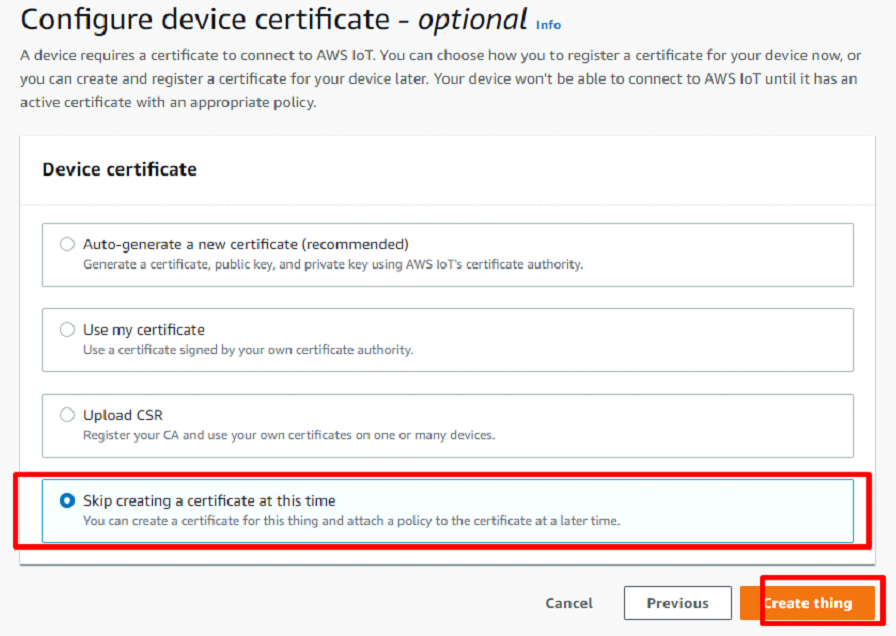
- Create a Thing and name it, this name will be used as the OpenMQTTGateway name.

# Create a policy

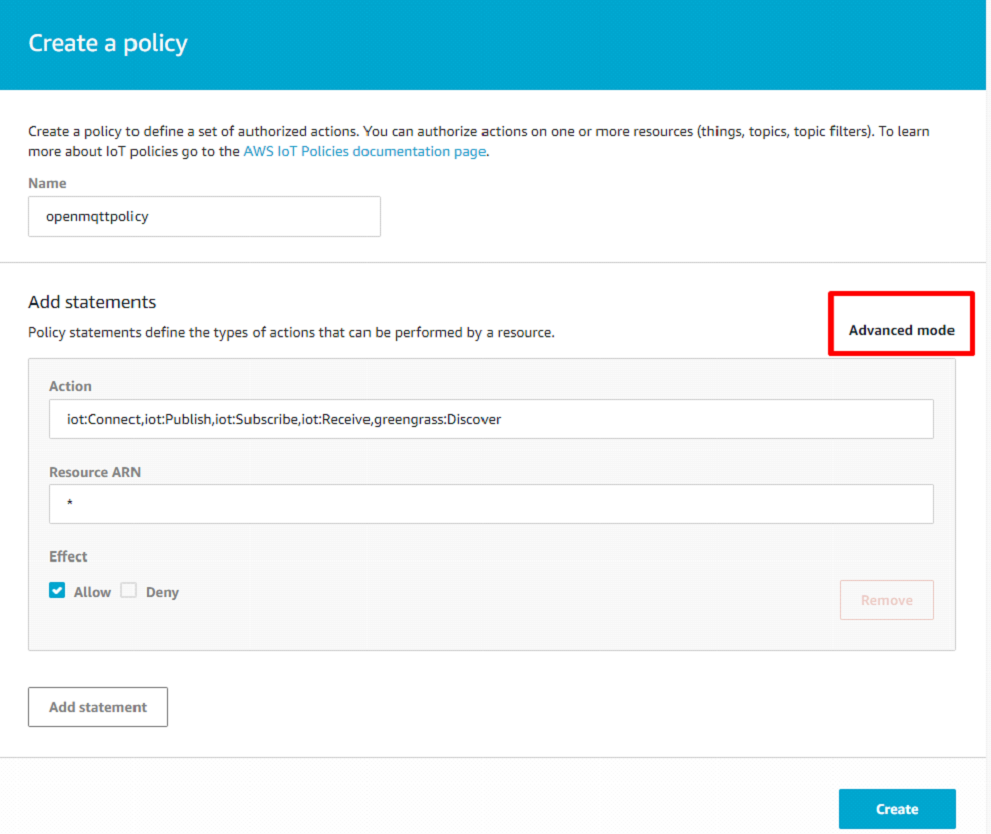
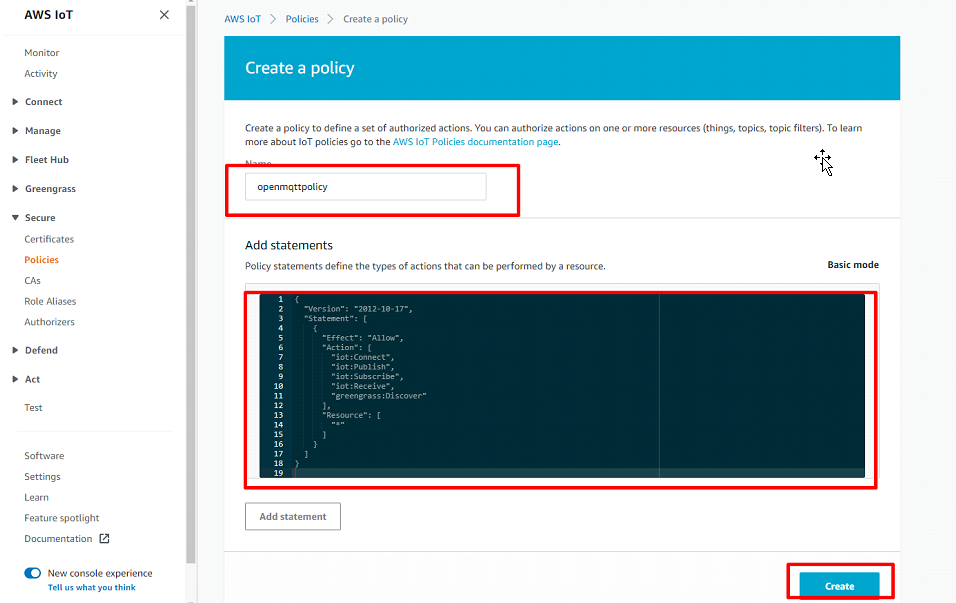
- Add this json code to the policy
{
  "Version": "2021-11-01",
  "Statement": [
    {
      "Effect": "Allow",
      "Action": [
        "iot:Connect",
        "iot:Publish",
        "iot:Subscribe",
        "iot:Receive",
        "greengrass:Discover"
      ],
      "Resource": [
        "*"
      ]
    }
  ]
}
1
2
3
4
5
6
7
8
9
10
11
12
13
14
15
16
17
18
2
3
4
5
6
7
8
9
10
11
12
13
14
15
16
17
18
# Create a certificate
- Create a new certificate

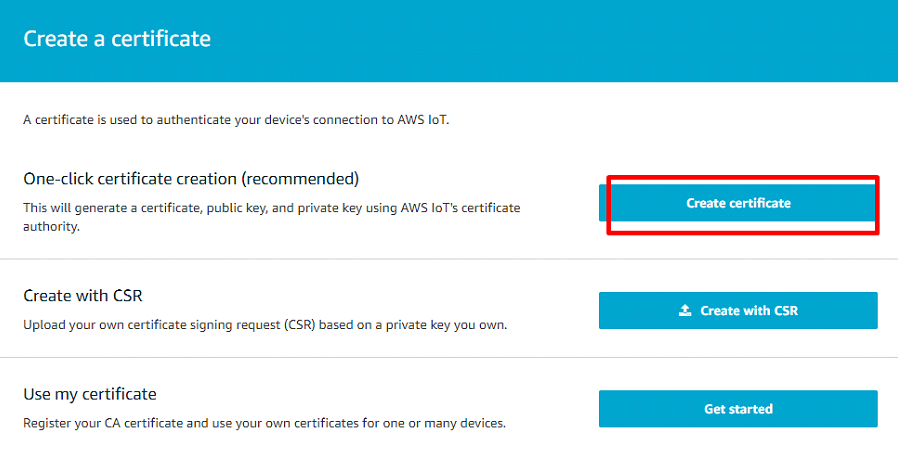
- Download certificates and key
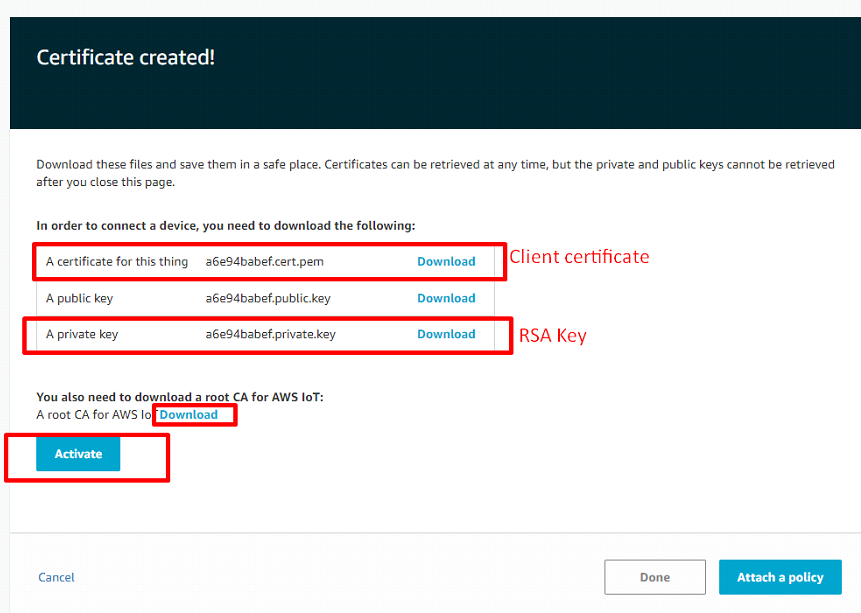
# Attach Policy with certificate
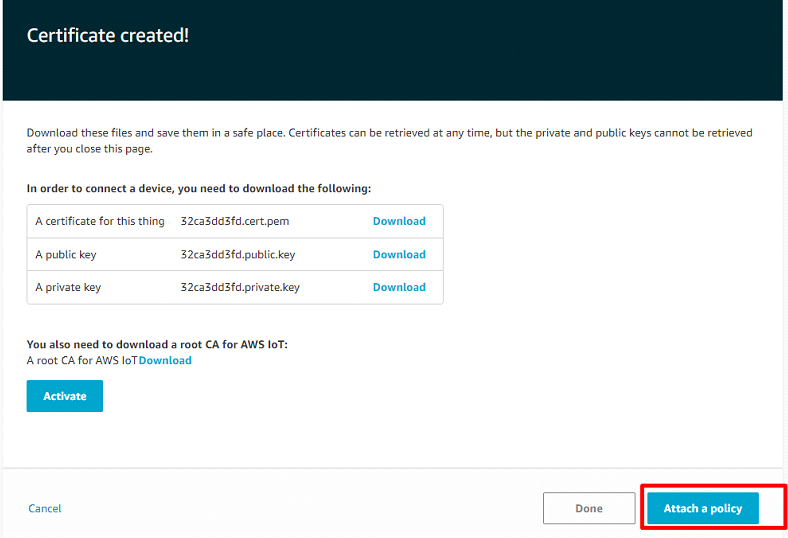
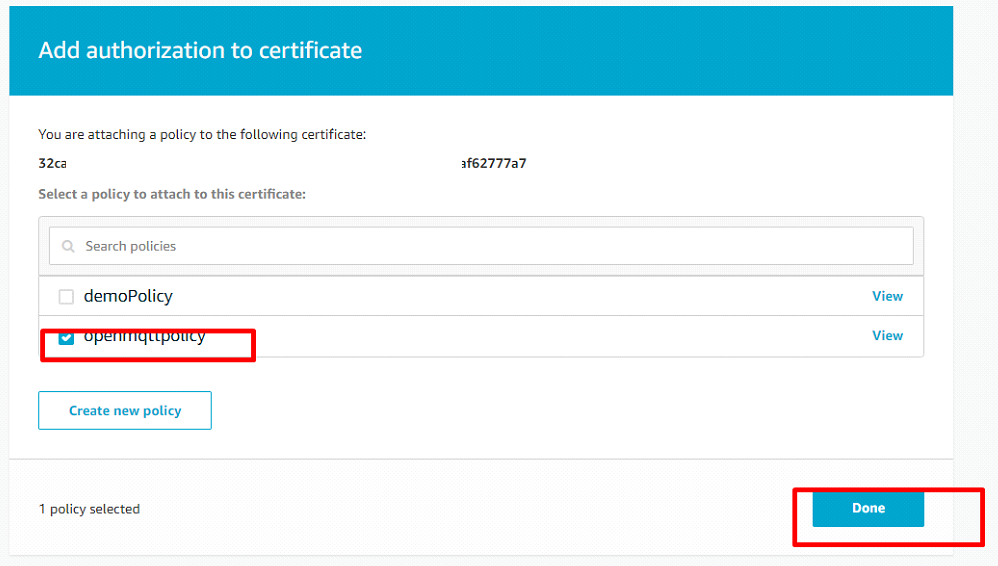
# Activate certificate and attach it to Thing
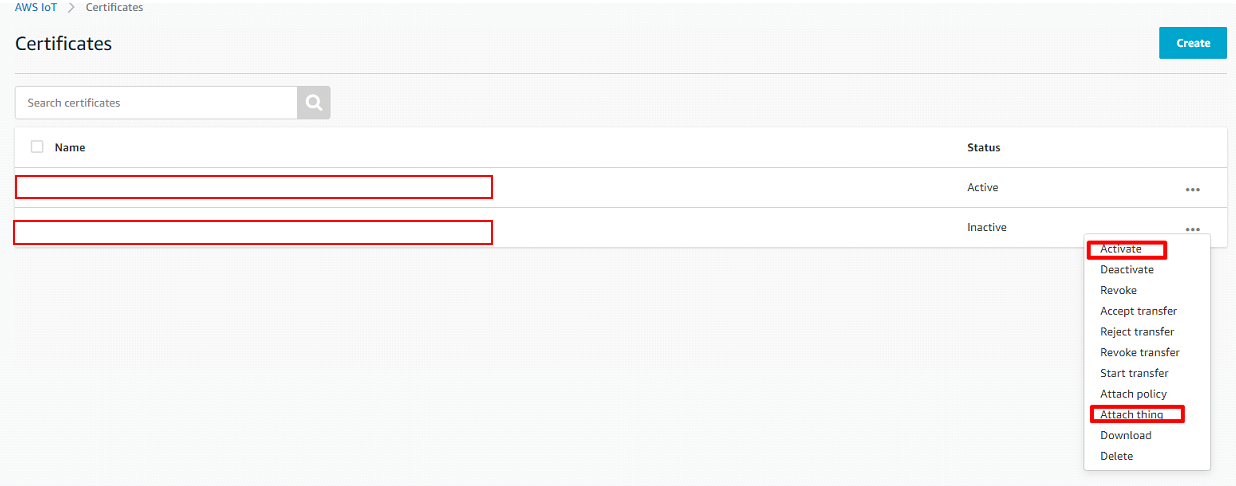
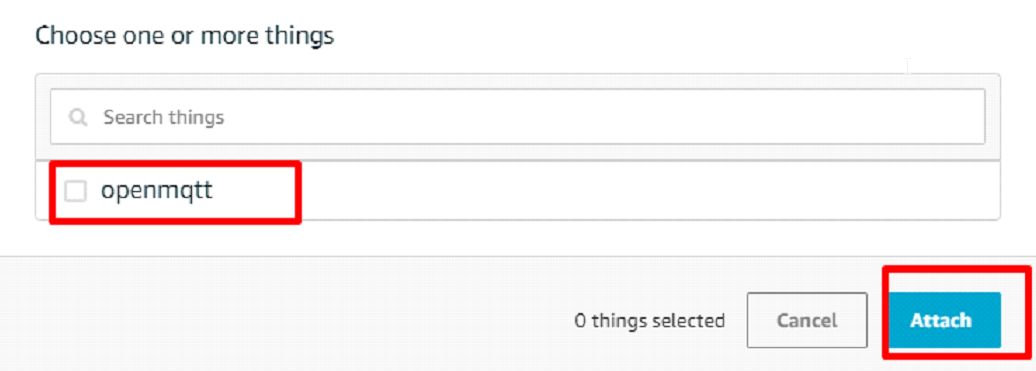
# Find AWS EndPoint
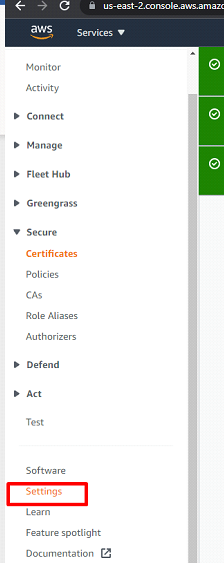
# Gather the information for OpenMQTTGateway configuration
Now you should have the following information for the OpenMQTTGateway configuration:
- Root certificate
- Client certificate
- Client key
- End point url
- Gateway name
# Modify OpenMQTTGateway configuration
With PlatformIO you can directly leverage the environment esp32dev-ble-aws as an example and modify it following your needs.
# Build and upload
# Connect to a WiFi Access point see portal
Enter your credentials and verify that Secure connection is marked.
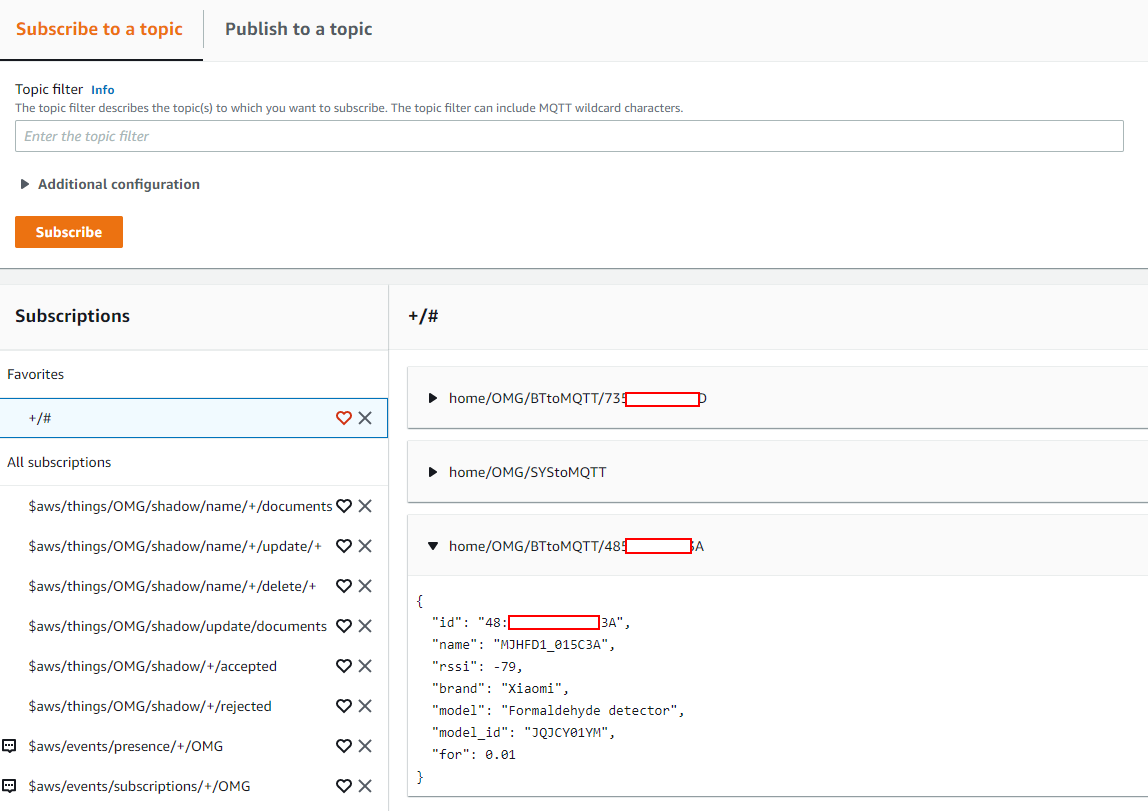
# Verify that you receive data in AWS
- Go to things
- Click on the thing created
- Go to Activity
- Click on MQTT Test Client
- Subscribe to
+/#
You should see messages coming.
